

At first I want to thank Charlie Bradbury, from TheEmbassyVfx, for his courtesy and for every image and info he sent me.
I don’t know if the new Citroen C4 Runner spot is available in all tv’s world.. so, before to start reading the post, here the link to watch this incredible Cg work!
- The Embassy official Site – The first spot on the left
- Citroen C4 Runner : Video sharing site
Following you can read some interesting informations from the email that he sent me some day ago… one more thanks to Charlie Bradbury.
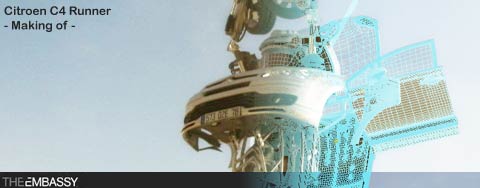
- Citroen C4 Runner: The concept
 For the Citroen ‘Runner’ spot we had the task of updating the robot and making him functional for the motions that he would be required to perform while keeping the style and feel of the original robot intact.
We went through a series of revisions with the head and leg pieces to find the best balance between look and functionality.
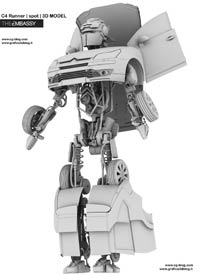
Adding moving gears, joints, springs and hydraulics helped o bring the 3d model to a higher level of detail and add secondary motion.
By working with highly detailed models we find that the shots achieve a level a realism that is only possible when light reacts with complex geometry.
Using Hdri for lightning
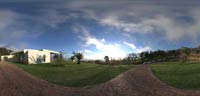
On set a pano-head is used in conjunction with a digital SLR and a circular fish eye lens to capture a high resolution 360 deg image of the surroundings in about 10-12 stops of exposure.
The stops are later stitched and combined together into an HDR image which is used as a source for reflection and extrapolation of light intensities and color (the sun in our case).
- Car Paint Shader
 These flakes sit on the paint at varied angles and cause light to spread as it reflects, hence the soft reflective quality of a silver car on top of a subtle but present diffuse shading effect.
A common mistake is to light this layer as if it were purely metalic.
The higher quality car paints do have a higher concentration of metallic flakes, but are not entirely composed of them.
In our case we used different shading layers:
- a Soft reflection layer that reproduces metalic flakes in the base coat
- a Diffuse layer which simulates the regular flat car paint in which the metallic flakes are mixed with
- a Specular layer
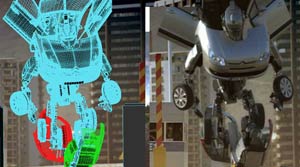
- Tranformation: The beginning
Sections of the robot had to switch from mocap to keyframe animation on demand, while other sections continued to use the mocap data. It was important that the transformation was both physically accurate as a real mechanical machine and look great to the viewer. A low resolution model was used for blocking out the initial animation.
Numerous versions of the transform were created before the final was selected. When the animation was approved for the next stage we moved to the high res version for first light and add all the secondary animation such as the hoses and hydraulics. Problems such as geometry intersecting was either fixed by tweaking the animation or painting out the error in comp.
Animation was also tweaked to reflect areas of the environment that looked best on the surface of the car.
- Transformation: The End
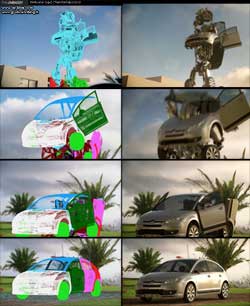 The last shot was the only animation where an F/IK rig was utilized to animate the Transformer.The end framing, where the car was folded up, was posed approximately to match the final car, and the beginning framing was setup in a pseudo stretch pose. The final cg car was imported in as a background object.
A few days were spent first positioning the boned objects to match as closely as possible to the final car position. Then, each car panel and object were keyframed to line up to the car.
Keyframes of the panels were offset a couple frames after the bones, to settle the animation. There were several objects from the interior of the transformer that broke through the geometry.
To hide the penetration, the break-through objects had their visibility animated off. Interior objects, such as car seats were animated separately to form into final position.
Modelling updates to the Transformer were substituted into position as they were completed… and that’s all about Citroen C4 Runner!