

Lightining Tutorial and Interior composition with vray render engine
Posted by Elips Computer | | Category:
v-ray
|
' In this tutorial I mean explain in details the technics I learnt to create a Photorealistic scene. I don't like you reproduce my technic in the same way, but this tutorial could be a starting point to develope your method '
PART I :: Modeling, lightning and vray materials tutorial settings
Modeling1.1 - Start creating 2 parallelepipeds, 10m x 10m, and 10cm thick, with 3m between them. These figures will be the floor and the ceiling in your scene. 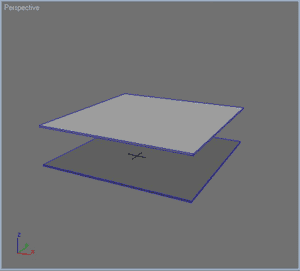 1.2 - Now, instead of modeling all the apartment, you will model the walls, windows and doors separately.. Here, for example, I created a little corner with two windows and a main wall. 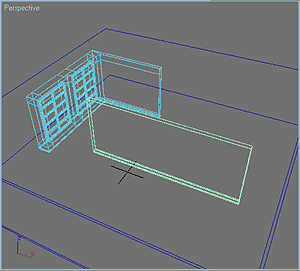 1.3 - Create a Vray light and put it near the window, then clone it as an "instance" of the other window. 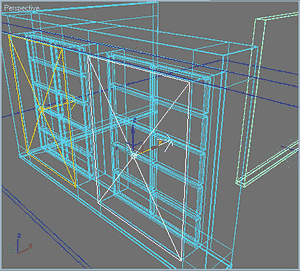 1.4 - When you finish creating the parts, put them all in the scene and obtain the standard scene, where you can start testing your materials. 1.5 - Create a "camera-target" pointing to the center of the scene, with a 42mm focal. You will use this camera as a support for testing your materials. 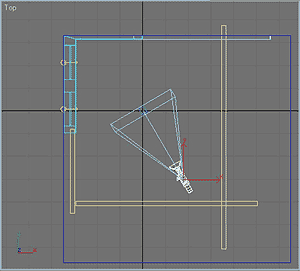 1.6 - Using the "import" or "merge" function, load a piece of furniture that you have already modeled in another scene. 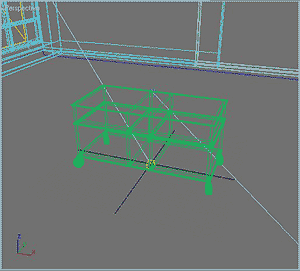 Tutorial Vray light, settings 1.7 - And God said : Let there be light !... So create a "direct target" light that you will call "Sol", put it in the scene and set intensity, color and active vray shadows. Then set the parameters, as you can see in the scheme below. 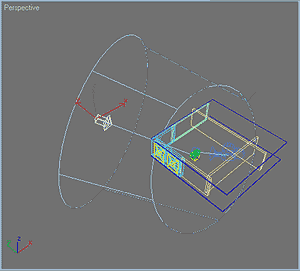 Rendering panelsettings: Irradiance map, color mapping 1.8 - Now start setting the vray rendering panel . The goal is to find the best configuration with an average quality, but in a very short time. Select Fixed Rate as antialiasing Activate the Indirect Illumination (selecting ON) In my opinion, the combination Irradiance map / Light cache, is the best one, especially if you consider speed and quality In the Irradiance Map section, select the "medium" preset For now, in the Light Cache area, leave Subdivisions to 100 and activate the Pre-Filter Activate the GI Environement, leaving the Multiplier to 1 Activate the Reflection/Refraction, and set it to 6. The goal is to increase the reflection intensity coming from the exterior. Increase Noise Threshold to 0.05 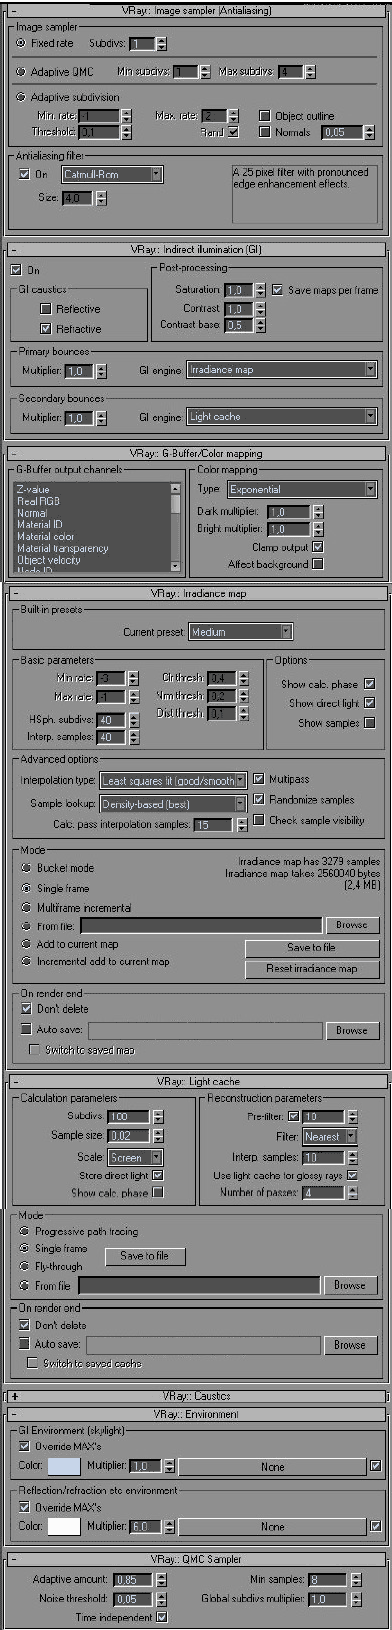 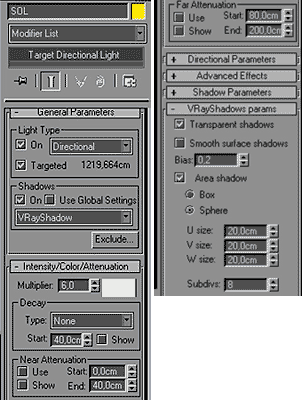 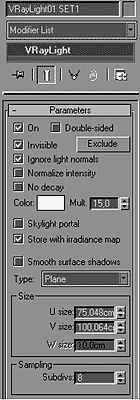 Shader material settings1.9 - When you have set the lights, go to material settings. I will not enter in great detail, because there are already many tutorials about this topic. Anyway, you will soon be able to see the attached scene [in the next days] 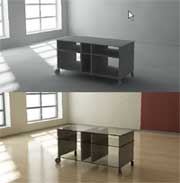 1.10 - When you have set your materials, use this scene to refine all the objects that you will include in the final composition. This step is very important, because you have to check the shader's reaction to the light in the scene. 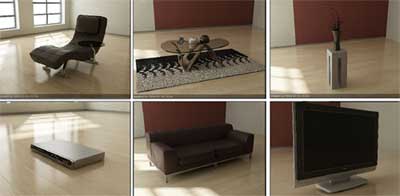 Vray light tutorial stop here. [Coming Soon] PART II :: Scene composition. I will talk about the key elements to be considered in a composition (weight, color, shot) and I will explain how important is to know the composition rules for obtaining a good Rendering. |